Knowing how to perform CPR (cardiopulmonary resuscitation) on an infant can be a lifesaving skill. Infants are particularly vulnerable to sudden respiratory or cardiac emergencies, and prompt action can make a crucial difference. CPR is a combination of chest compressions and rescue breaths that help maintain blood flow and oxygen supply to the brain and other vital organs until advanced medical care arrives.
In an emergency involving an infant, every second counts. That’s why it’s essential for parents, caregivers, and anyone who might be responsible for an infant to learn and understand the proper steps for administering CPR. While it’s always best to seek professional training, having a basic understanding of infant CPR can empower you to take action and potentially save a life.
What is CPR?
CPR is an emergency procedure that involves a series of chest compressions and rescue breaths. The Chest compressions help pump blood and oxygen through the body, while the rescue breaths provide vital oxygen to the lungs. When performed correctly, CPR can help maintain blood flow and oxygen supply to the brain and other vital organs until more advanced medical care becomes available.
In the case of an infant, the techniques for CPR differ slightly from those used on adults or older children. Infants have smaller bodies and more delicate anatomies, which require adjustments in the force and positioning used during chest compressions and rescue breaths.
Knowing the proper steps for infant CPR is crucial, as it can mean the difference between life and death in an emergency. In the following sections, we will outline the five essential steps for giving CPR to an infant, ensuring that you are equipped with the knowledge to act quickly and effectively when every second counts.
Step 1: Check for Responsiveness
The first step in administering CPR to an infant is to check if the infant is responsive. This involves gently tapping or flicking the soles of the infant’s feet and calling their name. If the infant does not respond by moving, crying, or opening their eyes, it is an indication that they may be unconscious and in need of CPR.
Signs of Unresponsiveness:
- No movement or reaction to stimuli
- Not breathing or gasping for air
- Limp or floppy body
If the infant shows any of these signs, it is crucial to proceed to the next step immediately. Time is of the essence in an emergency, and prompt action can significantly improve the chances of a positive outcome.
Step 2: Call for Emergency Help
After determining that the infant is unresponsive, the next step is to call for emergency medical assistance. If you are alone, perform CPR for about two minutes before calling for help. However, if there is someone nearby, have them call emergency services immediately while you begin CPR.
When calling for emergency help, be prepared to provide the following information:
- Your location (address or nearby landmarks)
- The nature of the emergency (unresponsive infant in need of CPR)
- The infant’s age and any known medical conditions
- Whether CPR is currently being performed
Remain calm and follow the dispatcher’s instructions carefully. They may provide additional guidance or walk you through the CPR steps until emergency responders arrive on the scene.
Step 3: Open the Airway and Check for Breathing
After calling for emergency help, the next step is to open the infant’s airway and check for breathing. An obstructed airway can prevent oxygen from reaching the lungs, making it essential to clear any blockages.
Opening the Airway:
- Place the infant on a firm, flat surface.
- Gently tilt the head back by placing one hand on the forehead and gently tilting the head back with the fingertips of your other hand on the bony part of the chin.
- This head-tilt, chin-lift maneuver helps open the airway.
Checking for Breathing:
- Place your ear close to the infant’s mouth and nose.
- Look for the rise and fall of the chest.
- Listen and feel for any breathing.
If the infant is not breathing or is only gasping, proceed immediately to the next step: performing chest compressions.
Signs of Breathing:
- Chest rising and falling
- Exhaled air felt on your cheek
- Sounds of breathing
Signs of Not Breathing:
- No chest movement
- No exhaled air
- No sounds of breathing
Recognizing these signs is crucial, as they will determine whether you need to perform both compressions and rescue breaths or just rescue breaths.
Time is of the essence, so it’s essential to check for breathing quickly but thoroughly. If you have any doubt about whether the infant is breathing, it’s safer to assume they are not and begin CPR immediately.
Step 4: Perform Chest Compressions
If the infant is not breathing or only gasping, you must immediately begin chest compressions to help circulate oxygenated blood throughout the body.
Proper Hand Positioning:
- Place the infant on their back on a firm, flat surface.
- Position yourself so that you are directly above the infant’s chest.
- Place two fingers on the breastbone, just below the nipples.
Compression Technique:
- Keep your arm straight and use the heel of your hand to compress the chest.
- Compressions should be about 1/3 to 1/2 the depth of the infant’s chest.
- Deliver compressions at a rate of 100-120 per minute.
It’s essential to maintain a steady rhythm and allow the chest to recoil fully between compressions. Proper compression depth and rate help maintain blood flow to vital organs.
Minimizing Interruptions:
- Minimize interruptions in chest compressions as much as possible. Any pause in compressions can reduce the effectiveness of CPR and decrease the chances of successful resuscitation.
- If you are the only rescuer present, perform two minutes of CPR (30 compressions followed by two rescue breaths) before calling emergency services if you haven’t already done so.
- Chest compressions are a critical component of infant CPR, as they help circulate oxygenated blood to the brain and other vital organs. Performing high-quality chest compressions can increase the chances of a successful resuscitation and improve the infant’s chances of survival.
Step 5: Provide Rescue Breaths
In addition to chest compressions, rescue breaths are necessary to provide oxygen to the infant’s lungs. The proper technique for providing rescue breaths is as follows:
- After every 30 chest compressions, tilt the infant’s head back and lift the chin to open the airway.
- Cover the infant’s mouth and nose with your mouth, making a complete seal.
- Give two gentle puffs of air into the infant’s lungs, watching for the chest to rise with each breath.
- Each breath should last about 1 second and should not be too forceful, as this could cause air to enter the stomach instead of the lungs.
The ratio of Compressions to Breaths:
- For infants, the recommended ratio is 30 compressions followed by 2 rescue breaths. Repeat this cycle of 30 compressions and 2 breaths until the infant begins breathing on their own or emergency medical personnel arrive.
- Rescue breaths are crucial because they provide the oxygen necessary for the infant’s body to utilize the blood circulation generated by the chest compressions. Without this vital oxygen supply, the chances of successful resuscitation are significantly reduced.
- It’s important to note that if you are unable or uncomfortable providing rescue breaths, you should continue with continuous chest compressions until emergency services arrive.
Continuing CPR
It’s important to continue CPR until emergency medical services arrive or the infant shows signs of life, such as breathing on their own. Continuous CPR can help maintain blood flow and oxygen supply to vital organs, increasing the chances of successful resuscitation.
How Long to Continue CPR:
CPR should be performed continuously until emergency responders arrive and take over
If you are the only rescuer present, perform about 2 minutes of CPR before calling emergency services if you haven’t already done so
Switching Roles with Another Rescuer:
If another person is available to help, switch roles every 2 minutes to prevent fatigue and ensure high-quality CPR. This can be done without interrupting chest compressions by having the new rescuer position themselves and prepare to take over while the current rescuer continues compressions.
Recovery Position
If the infant shows signs of life, such as breathing on their own, place them in the recovery position to help keep their airway open and clear.
Placing the Infant in the Recovery Position:
- Carefully turn the infant onto their side, supporting their head and neck.
- Extend one of the infant’s arms at a right angle to their body and straighten their leg on the same side.
- This position helps keep the airway open and allows any fluids to drain from the mouth.
Monitoring for Signs of Life:
Even after placing the infant in the recovery position, it’s important to continue monitoring for signs of life and be prepared to resume CPR if necessary.
Signs of life include:
- Normal breathing
- Coughing or movement
- Response to stimuli
Do not leave the infant unattended, and be prepared to call emergency services again if their condition deteriorates.
By continuing CPR until emergency responders arrive and properly positioning the infant if it shows signs of life, you maximize the chances of a positive outcome and give the infant the best possible care until advanced medical treatment is available.
Conclusion
Knowing how to perform CPR on an infant can truly be a lifesaving skill. While it’s always best to seek professional training, understanding these five essential steps can empower you to take action in an emergency:
- Check for responsiveness
- Call for emergency help
- Open the airway and check for breathing
- Perform chest compressions
- Provide rescue breaths
It’s crucial to act quickly and follow these steps precisely, as every second counts when an infant’s life is at stake. Prompt and effective CPR can maintain blood flow and oxygen supply to vital organs until advanced medical care arrives.
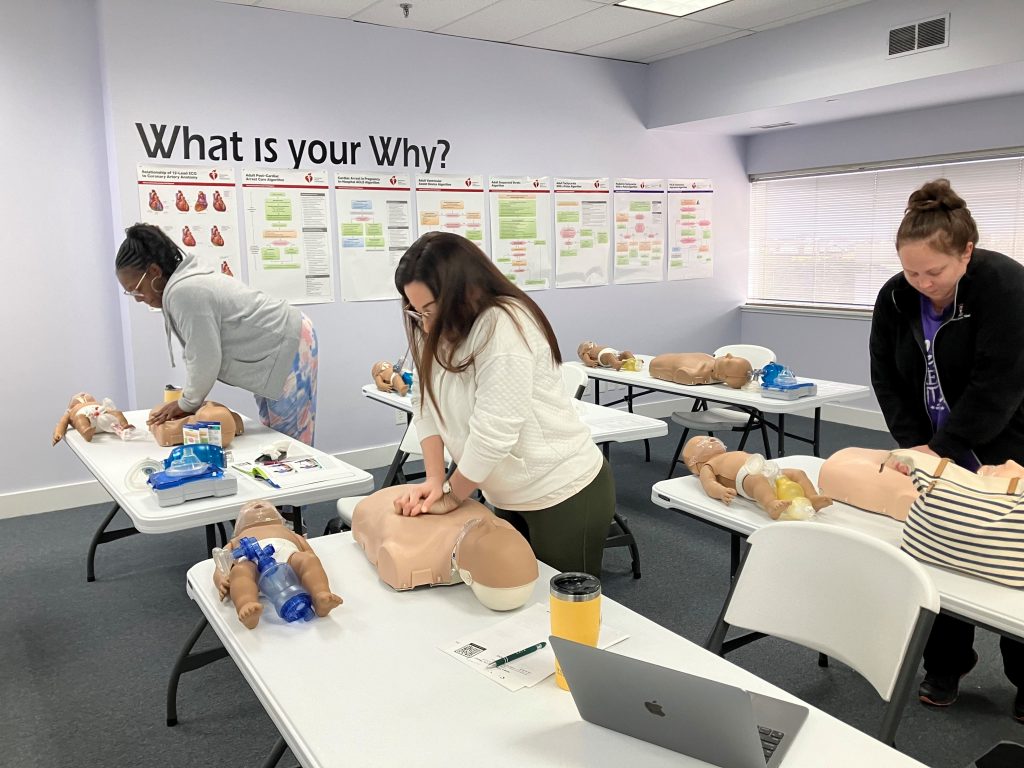
While having a basic understanding of infant CPR is valuable, it’s highly recommended to enroll in a CPR certification course to receive hands-on training and guidance from qualified instructors. In Louisville, numerous organizations offer CPR certification courses, equipping you with the knowledge and skills to confidently respond in an emergency.
By becoming CPR certified in Louisville, you’ll not only learn the proper techniques for infant CPR but also gain expertise in adult CPR, choking relief, and other lifesaving skills. These comprehensive courses provide invaluable experience through practice scenarios and feedback from experienced instructors.
Don’t wait until it’s too late – invest in CPR certification Louisville today. Numerous local providers, such as the American Red Cross, American Heart Association, and community centers, offer convenient class schedules to fit your lifestyle. By taking this proactive step, you’ll have the confidence and preparedness to potentially save a life when it matters most.
Performing CPR correctly and without hesitation can significantly improve an infant’s chances of survival in a respiratory or cardiac emergency. By being prepared and taking action, you can make a profound difference in a critical situation. Enroll in a CPR certification Louisville course today and equip yourself with this invaluable lifesaving skill.


