When someone experiences sudden cardiac arrest, every second counts. An Automated External Defibrillator (AED) can be the difference between life and death. Understanding the 7 steps of using an AED properly can empower you to save a life in a critical emergency.
Sudden cardiac arrest strikes over 350,000 Americans annually outside of hospitals. However, immediate CPR combined with AED use can increase survival rates by up to 70%. This makes learning the proper steps of using an AED one of the most valuable skills you can acquire.
What Is an AED and Why Are the Steps Important?
An Automated External Defibrillator is a portable device that analyzes heart rhythms and delivers electric shocks when necessary. These life-saving devices are designed for use by both medical professionals and trained bystanders. The steps of using an AED are specifically designed to be simple yet effective, ensuring that anyone can operate the device during an emergency.
Modern AEDs feature voice prompts and visual instructions that guide users through each step. Nevertheless, understanding the proper sequence beforehand significantly improves your confidence and response time during actual emergencies.
Step 1: Assess the Scene and Check Responsiveness
The first step of using an AED begins before you even touch the device. Initially, you must ensure the scene is safe for both you and the victim. Look for hazards such as water, fire, electrical wires, or traffic that could endanger everyone involved.
Next, check if the person is responsive by tapping their shoulders firmly and shouting, “Are you okay?” If they don’t respond and aren’t breathing normally, they may be experiencing cardiac arrest. This assessment step is crucial because AEDs should only be used on unresponsive individuals who aren’t breathing or are gasping abnormally.
Additionally, call 911 immediately or have someone else make the call while you continue with the remaining steps. Time is critical, and emergency medical services need to be en route as quickly as possible.
Step 2: Call for Help and Locate the AED
The second step of using an AED involves getting additional help while locating the device. Shout for help to attract bystanders who can assist with calling emergency services, performing CPR, or retrieving the AED if it’s not immediately available.
Many public places, including schools, airports, shopping centers, and office buildings, have AEDs mounted on walls with clear signage. These devices are typically stored in bright cabinets or cases that are easily identifiable during emergencies.
Furthermore, if someone else is present, delegate tasks effectively. Have one person call 911, another retrieve the AED, and begin CPR yourself if you’re trained. This coordinated approach ensures all critical steps happen simultaneously rather than sequentially.
Step 3: Turn on the AED and follow the Voice Prompts
The third step of using an AED is powering on the device, which activates its guidance system. Most AEDs have a prominent power button, while others turn on automatically when you open the case or lift the lid.
Once activated, the AED will provide clear voice instructions for each subsequent step. These prompts are designed to guide even untrained individuals through the process safely and effectively. Listen carefully to each instruction and follow it precisely.
Modern AED models also feature visual displays with diagrams showing proper pad placement and other critical information. These visual cues complement the voice prompts, ensuring you understand each step even in high-stress situations.
Step 4: Expose and Prepare the Victim’s Chest
The fourth step of using an AED requires proper chest preparation to ensure effective pad placement. Remove all clothing from the victim’s chest, including shirts, bras, and any jewelry that might interfere with the electrode pads.
Check for any medical patches, medication patches, or implanted devices like pacemakers. If you find medication patches, remove them with gloved hands if available, then wipe the area clean. For pacemakers or other implanted devices, place the AED pads at least one inch away from the device.
Additionally, if the chest is wet from sweat, rain, or other fluids, dry it quickly with a towel or cloth. Moisture can interfere with the electrical connection and reduce the effectiveness of the shock. If the person has excessive chest hair, some AEDs include razors for quick removal in the pad placement areas.
Step 5: Attach the AED Pads Correctly
The fifth step of using an AED involves precise pad placement, which is critical for effective defibrillation. Remove the adhesive electrode pads from their packaging and identify the correct placement positions shown on the pad illustrations.
Place the first pad on the upper right side of the chest, just below the collarbone and to the right of the breastbone. The second pad goes on the lower left side of the chest, below the left nipple and along the side of the ribcage. Press firmly around the edges of each pad to ensure complete skin contact.
The pads must adhere completely without air bubbles or loose edges. Poor pad contact can prevent effective shock delivery and reduce the chances of successful defibrillation. Take a moment to ensure both pads are properly positioned and securely attached before proceeding.
Step 6: Analyze Heart Rhythm and Clear the Area
The sixth step of using an AED involves the device’s analysis of the victim’s heart rhythm. Once the pads are properly connected, the AED will automatically begin analyzing the heart’s electrical activity to determine if a shock is needed.
During this analysis phase, nobody must touch the victim. Announce loudly, “Clear! Everyone stand back!” and visually confirm that no one is in contact with the person. Even slight contact can interfere with the analysis or cause injury if a shock is delivered.
The analysis typically takes 5-15 seconds, during which the AED determines whether the heart rhythm is “shockable.” The device will clearly announce its findings through voice prompts, either advising shock delivery or recommending immediate CPR.
Step 7: Deliver Shock and Continue Care
The seventh and final step of using an AED depends on the device’s analysis results. If the AED advises a shock, ensure everyone remains clear of the victim, then press the shock button when prompted. The device will deliver a controlled electrical impulse designed to reset the heart’s rhythm.
After a shock delivery, immediately begin CPR, starting with chest compressions. The AED will guide you through cycles of CPR, typically instructing 2 minutes of compressions before analyzing the rhythm again. Continue following the device’s prompts until emergency medical services arrive.
If the AED advises “no shock,” begin CPR immediately with chest compressions. The device will continue monitoring and may advise shock delivery during subsequent analysis cycles. Maintain CPR quality with proper compression depth and rate as instructed.
Common Mistakes to Avoid When Following AED Steps
Understanding what not to do is equally important as knowing the proper steps of using an AED. Never use an AED on someone conscious, breathing normally, or responsive. Additionally, avoid using the device in wet conditions or on metal surfaces that could conduct electricity.
Don’t remove the pads once applied unless instructed by emergency medical personnel. The AED needs to maintain a connection for continued monitoring and potential additional shocks. Furthermore, never touch the victim during analysis or shock delivery phases, as this can interfere with the device’s function and cause injury.
Importance of Proper Training in AED Steps
While AEDs are designed for ease of use, proper training significantly improves outcomes during real emergencies. Training programs teach not only the technical steps of using an AED but also how to remain calm under pressure and coordinate with other responders effectively.
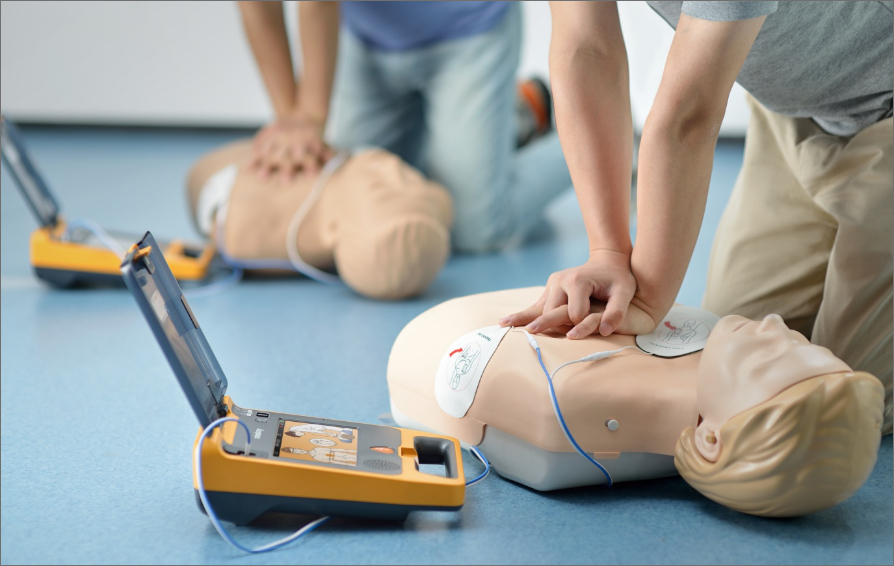
Professional certification courses provide hands-on practice with actual AED devices, allowing you to become familiar with different models and their specific features. This experience builds confidence and muscle memory that proves invaluable during high-stress emergency situations.
Moreover, training often includes integration with CPR techniques, creating a comprehensive skill set for cardiac emergency response. Understanding how AED steps coordinate with chest compressions and rescue breathing creates a more effective overall response strategy.
Legal Protection and Good Samaritan Laws
Most states have Good Samaritan laws that protect individuals who provide emergency assistance in good faith, including those who use AEDs during cardiac emergencies. These laws recognize that properly trained individuals following established protocols should not face legal liability for their life-saving efforts.
However, legal protection typically requires that you act within your training level and follow accepted procedures. This makes proper education in the steps of using an AED not only medically important but also legally prudent for anyone who might respond to emergencies.
Understanding these protections can give you confidence to act decisively when someone’s life depends on your quick response and proper application of AED procedures.
Building Confidence Through Certification
Learning the 7 steps of using an AED through professional certification builds the confidence needed to act effectively during real emergencies. Certification programs provide structured learning environments where you can practice these steps repeatedly until they become second nature.
Quality training programs also teach you to integrate AED use with other emergency response skills, creating a comprehensive approach to cardiac emergency management. This integrated knowledge helps you make better decisions about when and how to implement each step most effectively.
Regular recertification ensures your skills remain sharp and up-to-date with current guidelines and technology improvements. As AED technology evolves, staying current through professional training keeps you prepared for any emergency.
Take Action: Get Certified Today
Don’t wait until an emergency happens to learn these life-saving skills. The 7 steps of using an AED are most effective when performed by confident, trained individuals who can act quickly and decisively.
Ready to become a certified life-saver? CPR Cincinnati is an American Heart Association training site that offers comprehensive certification programs, including BLS for Healthcare Providers, ACLS, PALS, and CPR and First Aid courses. All classes are stress-free and hands-on, ensuring you gain practical experience with real AED devices.
Whether you need CPR certification Cincinnati training for professional requirements or want to be prepared for emergencies in your community, CPR Cincinnati provides the expert instruction you need. Our BLS certification in Cincinnati programs and other courses give you the skills and confidence to respond effectively when lives are on the line.
Contact CPR Cincinnati today to schedule your certification class and join the ranks of trained responders who are ready to save lives in their communities. Remember, the best CPR in Cincinnati starts with proper training – and that training starts with your decision to act.