Introduction
Cardiopulmonary Resuscitation (CPR) is a critical life-saving technique that can mean the difference between life and death in emergency situations. When performed correctly, CPR can maintain blood flow to vital organs, buying precious time until professional medical help arrives. While many factors contribute to effective CPR, one of the most crucial elements is proper hand positioning.
The placement and technique of your hands during chest compressions directly impact the effectiveness of CPR. Correct hand positioning ensures that you apply force to the right area of the chest, maximizing the compression’s impact on the heart and circulatory system. It also helps prevent injury to both the rescuer and the person receiving CPR.
Correct Hand Position
Location on the Chest
The first step in proper hand positioning is finding the correct location on the chest. For adult CPR:
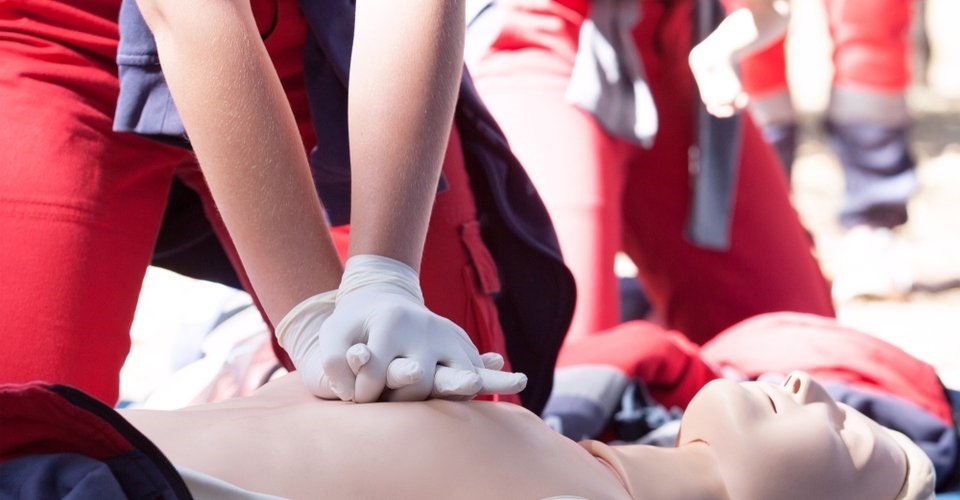
- Place the heel of one hand at the center of the person’s chest, on the lower half of the breastbone (sternum).
- Avoid placing your hand too low (over the xiphoid process) or too high (near the neck).
- The ideal spot is typically between the nipples, slightly below the midpoint of the chest.
Interlocking Fingers Technique
Once you’ve found the correct spot:
- Place your other hand directly on top of the first hand.
- Interlock your fingers, lifting them slightly so only the heel of your bottom hand is in contact with the chest.
- This interlocking technique helps concentrate force through the heel of your hand and prevents your fingers from pressing directly on the ribs.
Keeping Arms Straight
Proper arm positioning is crucial for effective compressions:
- Position yourself so that your shoulders are directly over your hands.
- Keep your arms straight, locking your elbows.
- This alignment allows you to use your upper body weight to aid in compressions, reducing fatigue and maintaining consistent pressure.
By mastering these elements of hand positioning, you set the foundation for delivering high-quality chest compressions. Remember, proper technique not only increases the effectiveness of CPR but also helps prevent injury to both the rescuer and the person receiving care.
Common Mistakes
While learning proper hand positioning for CPR, it’s crucial to be aware of common mistakes that can reduce the effectiveness of chest compressions or potentially cause harm.
Incorrect Placement on the Chest
One of the most frequent errors is improper hand placement:
- Positioning hands too high on the chest, near the neck, which can damage the trachea.
- Placing hands too low, over the xiphoid process, risking damage to internal organs.
- Off-center placement reduces the effectiveness of compressions on the heart.
Bent Elbows
Another common mistake is performing compressions with bent elbows:
- This reduces the force of compressions and quickly leads to rescuer fatigue.
- It can cause the rescuer to “push” rather than use their body weight effectively.
- Bent elbows often result in inconsistent compression depth and rate.
Improper Hand Interlocking
Mistakes in hand interlocking can also impact CPR effectiveness:
- Failing to interlock fingers, can lead to unstable hand positioning.
- Pressing fingers directly onto the chest, potentially causing rib injuries.
- Gripping the lower hand with the upper hand reduces the concentration of force.
Proper Technique
To avoid these common mistakes and ensure effective CPR, focus on mastering these elements of proper technique:
Finding the Correct Spot Quickly
In an emergency, time is critical. Practice locating the correct hand position swiftly:
- Use visual cues like the nipple line to quickly identify the lower half of the sternum.
- Develop muscle memory through regular practice on CPR mannequins.
- Remember, it’s better to start compressions slightly off-center than to delay trying to find the perfect spot.
Maintaining Position During Compressions
Consistent hand placement throughout CPR is crucial:
- Keep your hands in contact with the chest during the entire compression cycle.
- Avoid “bouncing” off the chest between compressions, which reduces efficiency.
- If you feel your hands slipping, quickly readjust between compressions without breaking rhythm.
Ensuring Consistent Depth and Rate
Proper hand positioning contributes to maintaining the correct compression depth and rate:
- Aim for a compression depth of at least 2 inches (5 cm) for adults.
- Maintain a rate of 100-120 compressions per minute.
- Allow full chest recoil between each compression to enable proper blood flow.
By focusing on these aspects of proper technique and actively avoiding common mistakes, you can significantly improve the quality and effectiveness of your CPR efforts. Remember, regular practice and training are key to maintaining these skills and being prepared for real-life emergencies.
Training and Practice
Mastering hand positioning for CPR requires more than just reading about the technique. Regular training and practice are essential to develop the necessary skills and muscle memory.
Importance of Professional Instruction
While self-study is valuable, professional instruction is crucial:
- Certified instructors can provide hands-on guidance and immediate feedback.
- Professional courses often use advanced mannequins that simulate realistic scenarios.
- Instruction helps clarify nuances that may not be apparent from written materials alone.
Regular Refresher Courses
CPR skills can deteriorate over time if not regularly practiced:
- Most certification organizations recommend refresher courses every 2 years.
- Some studies suggest more frequent practice, even annually, to maintain optimal skills.
- Refresher courses often cover updates to CPR guidelines and techniques.
At-home Practice Methods
Between formal training sessions, you can maintain your skills at home:
- Use a CPR practice mannequin or a firm pillow to simulate chest compressions.
- Practice finding the correct hand position quickly on family members (without actual compressions).
- Use online videos and apps that provide rhythm guidance for compression rate.
Special Considerations
While the basic principles of hand positioning remain consistent, there are some special considerations for different situations.
Adjustments for Different Body Types
CPR technique may need slight modifications depending on the individual:
- For larger individuals, you may need to use more force to achieve proper compression depth.
- On very thin individuals, be extra cautious to avoid pressing on the ribs directly.
- For individuals with breast implants, hand position remains the same, but be aware that more force may be needed.
Modifications for Infants and Children
CPR technique differs for infants (under 1 year) and children (1 year to puberty):
- For infants:
- Use two fingers for compressions instead of the heel of the hand.
- Place fingers just below the nipple line.
- Compress to a depth of about 1.5 inches (4 cm).
- For children:
- Use one hand for compressions (two hands for larger children if necessary).
- Place the heel of one hand on the lower half of the sternum.
- Compress to a depth of at least 2 inches (5 cm).
Conclusion
Mastering hand positioning is a critical component of effective CPR. By understanding the correct technique, avoiding common mistakes, and regularly practicing your skills, you can significantly increase the chances of a positive outcome in a cardiac emergency.
Remember these key points:
- Proper hand placement is at the center of the chest, on the lower half of the sternum.
- Interlock your fingers and keep your arms straight for effective compressions.
- Avoid common mistakes like incorrect placement, bent elbows, and improper hand interlocking.
- Regular training and practice are essential to maintain and improve your CPR skills.
- Be aware of modifications needed for different body types and age groups.
While we hope you never need to use these skills, being prepared with proper CPR techniques, including correct hand positioning, can make a life-saving difference in an emergency situation. Consider taking a certified CPR course to further develop your skills and confidence in performing this crucial life-saving technique.


